Practical 0 - Setup and Git Fundamentals
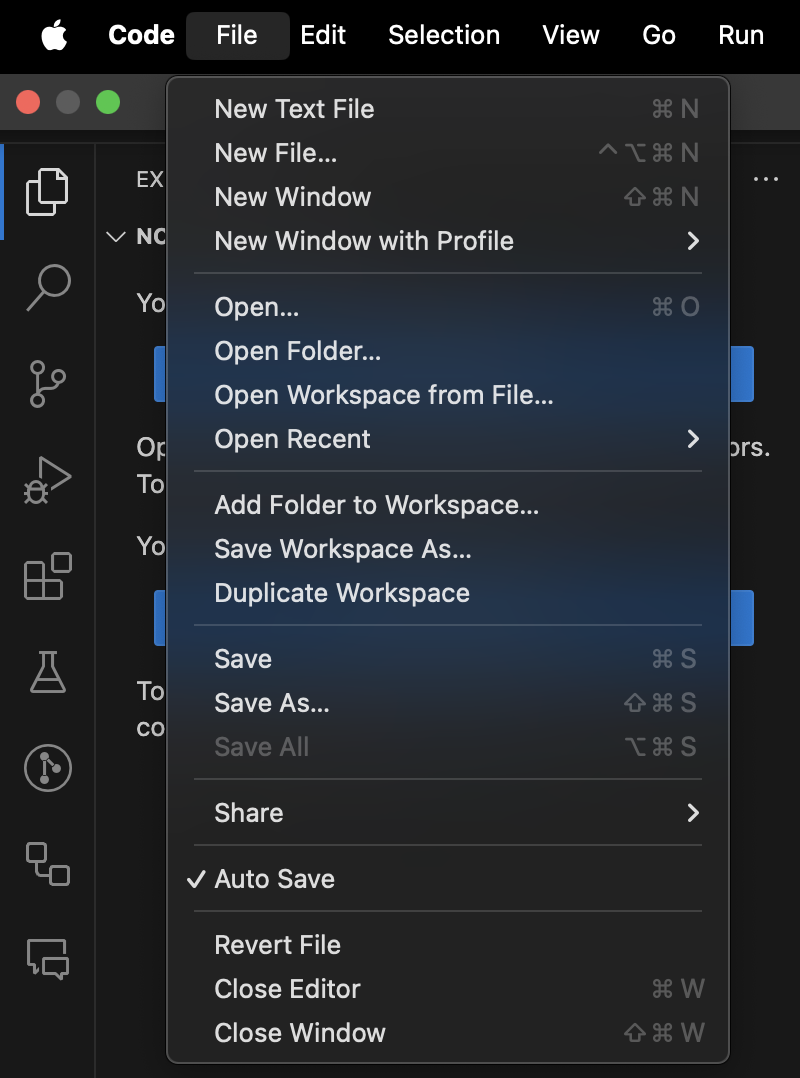
Please enable the autosave feature in VScode before proceeding with this practical, this can be found in the File tab in the VScode window:
Part 1:Creating and saving a Python file.
Step 1: Open the VSCode application.
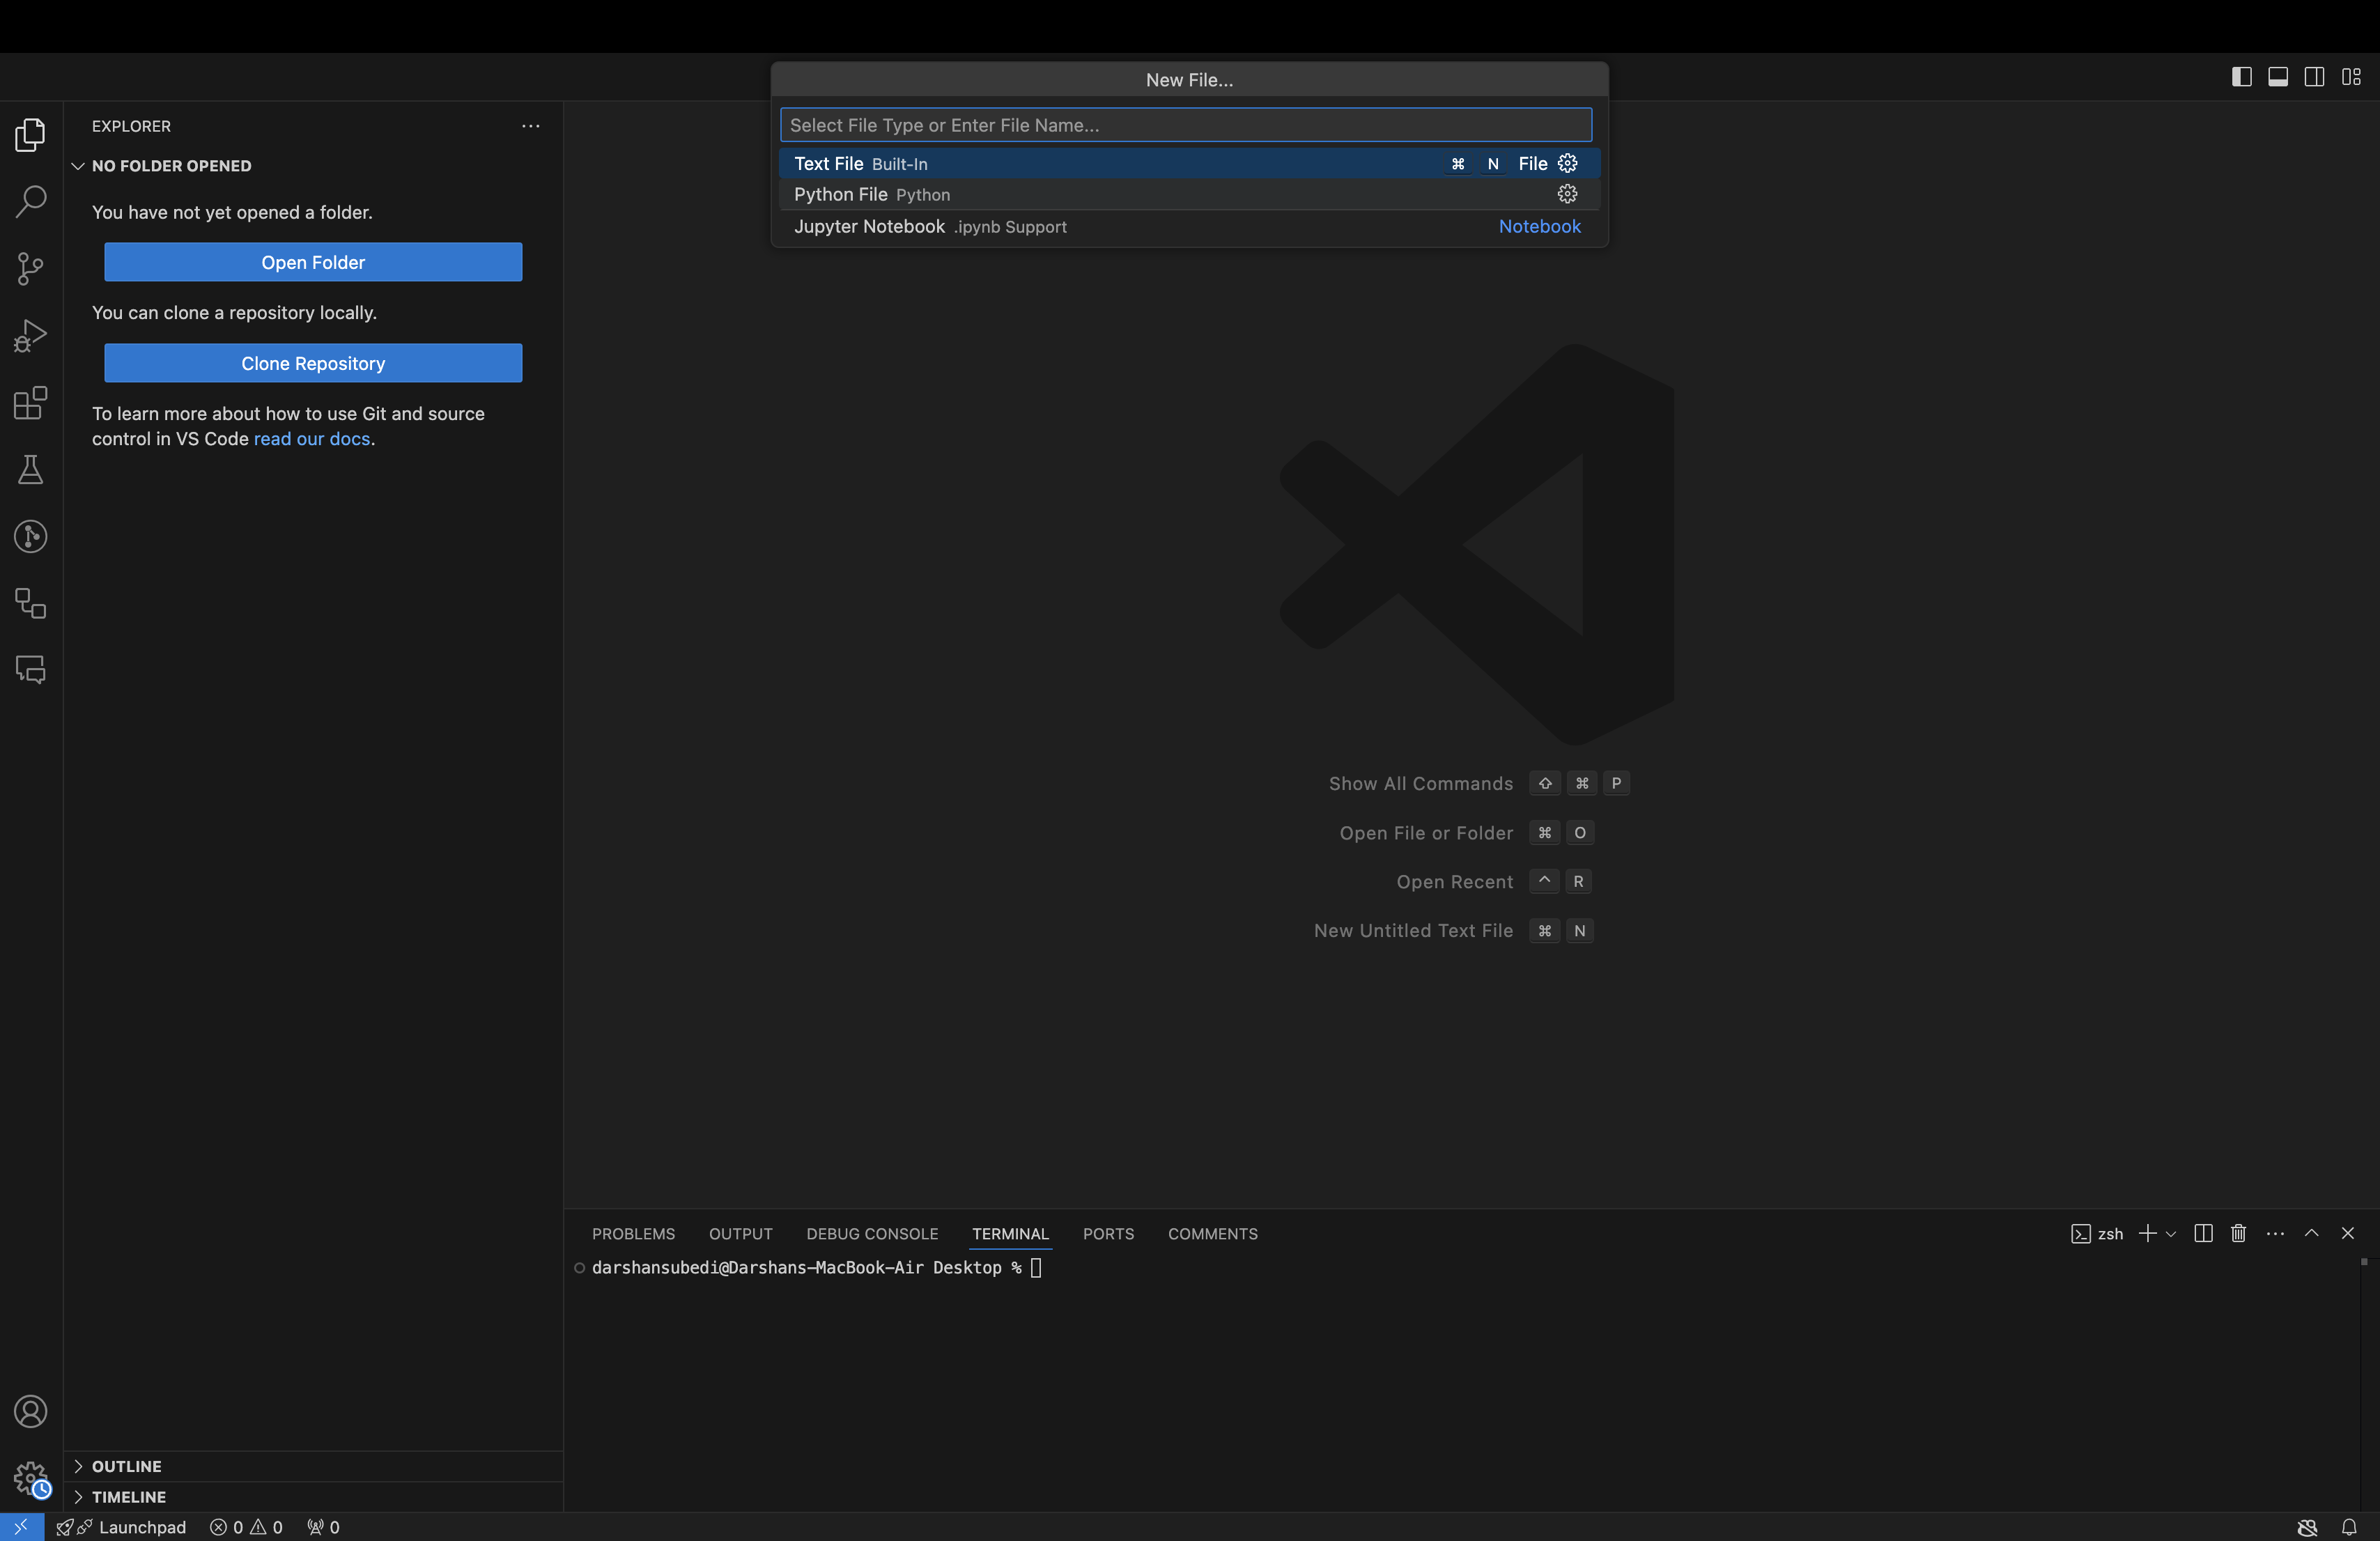
Step 2: On the top left corner, click on the file tab. Select the new file option.

Step 3: In the drop-down menu as shown below, select the Python file option.
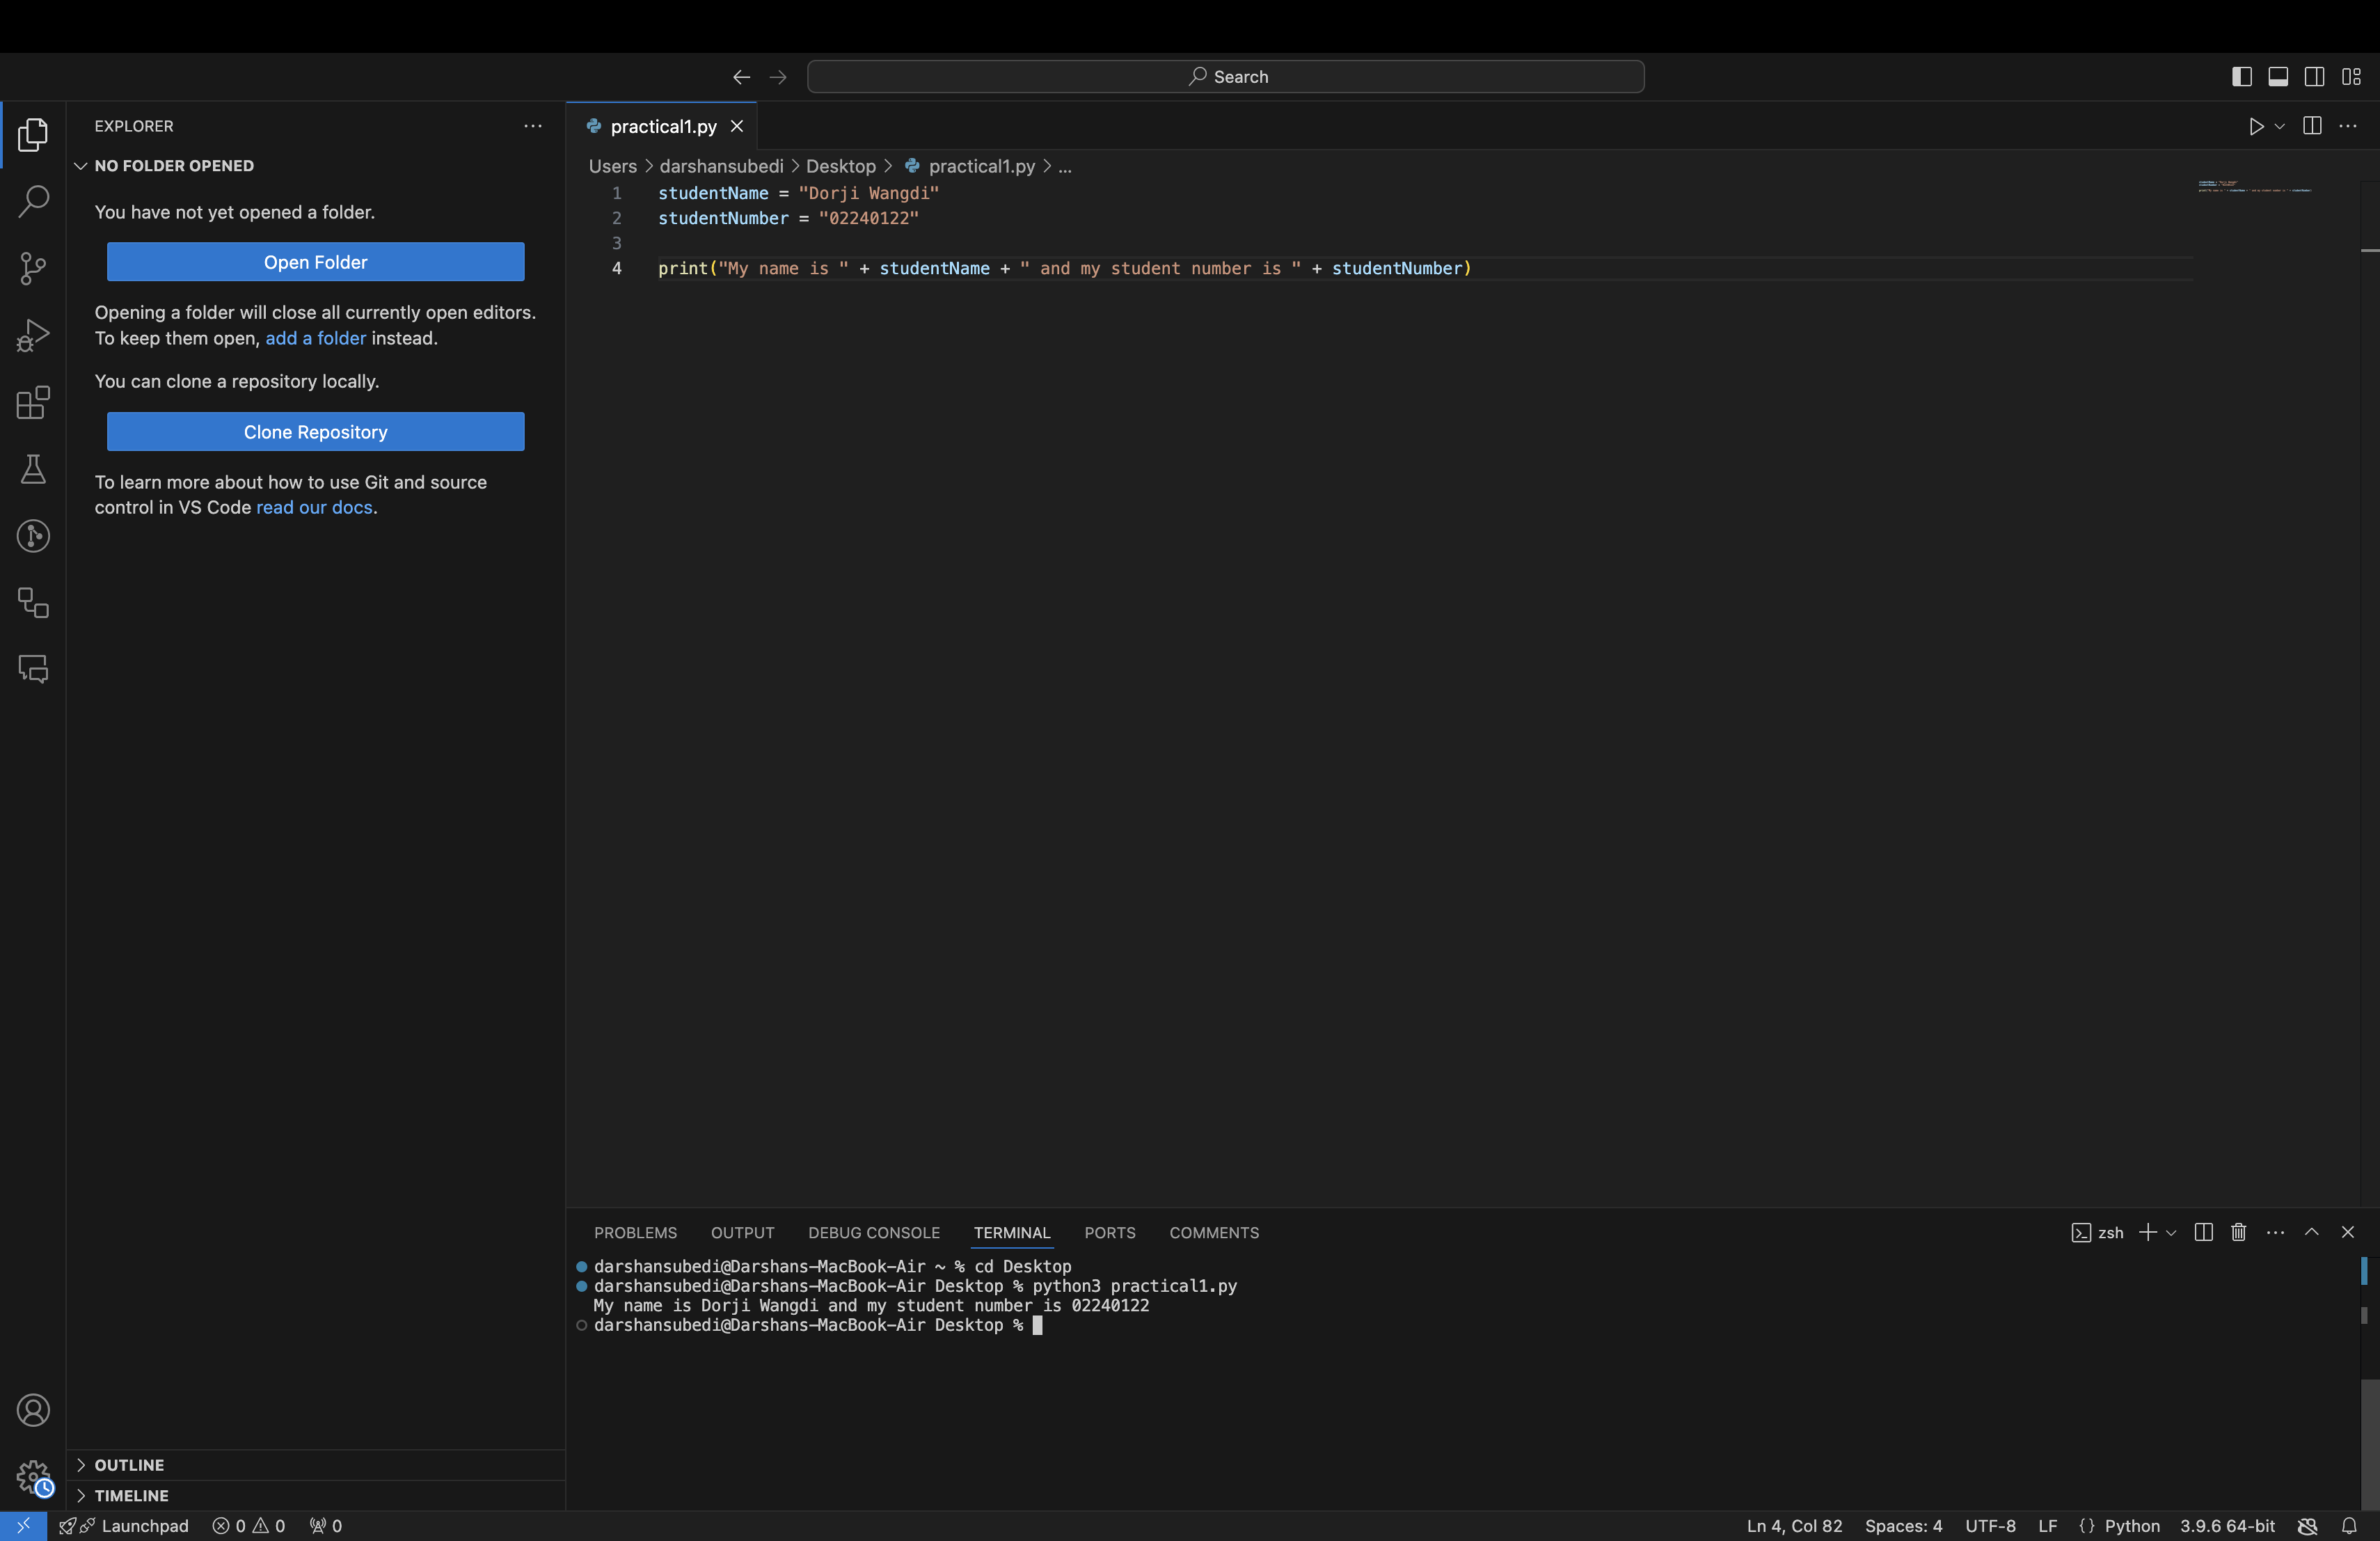
Step 4: Type the following simple program that will print your name and student ID:
studentName = "Sonam Choden"
studentNumber = "02240122"

print("My name is " + studentName + " and my student number is " + studentNumber)
Step 5: In the top left-hand corner, select the File tab, click on the Save As tab, and select a destination folder (eg: Desktop). Then save your file with the name practical1.py
Note that your file name must have no spaces and avoid using special characters, you must follow this rule for all files & folders created for your practicals here after
Step 6: Click on the terminal window, and use the ls (list all files) command to locate the folder you previously saved your file in (i.e. Desktop). Use the cd(change directory eg: cd Desktop ) command to access your saved file.
Step 7: Use the python3 command followed by your file name to run your file.
Congratulations, you have completed the first part of your practical. You now know:
- How to create a Python file.
- How to save a Python file.
- How to locate a file in your computer using the ls and cd command in the terminal window.
- How to run your Python file.
Part 2: Git installation
Step 1: Download git on your computer. The steps may vary depending on if you are using a Windows, Mac, or Linux operating system on your computer.
Tutorial for windows: https://www.youtube.com/watch?v=iYkLrXobBbA
Tutorial for Mac: https://www.youtube.com/watch?v=B4qsvQ5IqWk
Note: it is recommended to use a package manager like homebrew for any software you install into your computer here after
Download git from here: https://git-scm.com/downloads
Part 3: Using git
Once you have successfully installed git, open the VScode window you were previously working on. Click on the terminal window.
Step 1: To confirm if git was properly installed in your computer, in the terminal window, type the following command:
git -version
The output must show the current version of git installed on your computer. If there are any errors, it means that git wasn't properly installed on your computer, seek assistance from your module tutor to fix this issue.
Before you proceed to step 2, ensure that the file you created earlier is now saved inside a folder. The folder can be named CSF101Practicals.
Step 2: From the terminal window, ensure that your current directory is the folder you created inside which you have saved for your file. You can verify this by checking your terminal and seeing if the file path is correct:
Example: in the image below, you can see that the last part of my file path reflects the current directory I am accessing using the terminal.

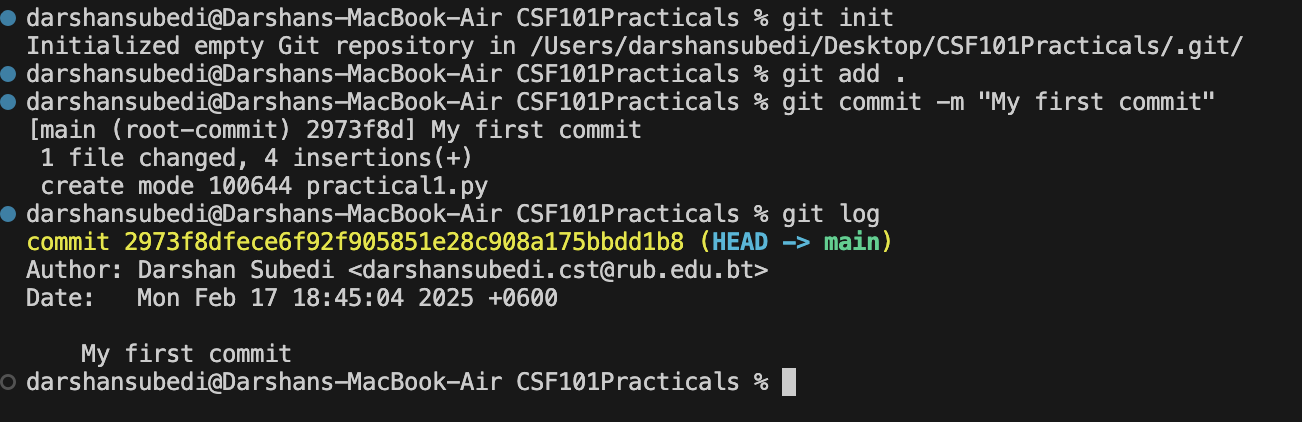
Step 3: Use the following command to initialize a git repository
git init
This initializes an empty git repository inside your folder
Step 4:
Create branch in the repository
git branch -M main
Step 5: Next, type the following command
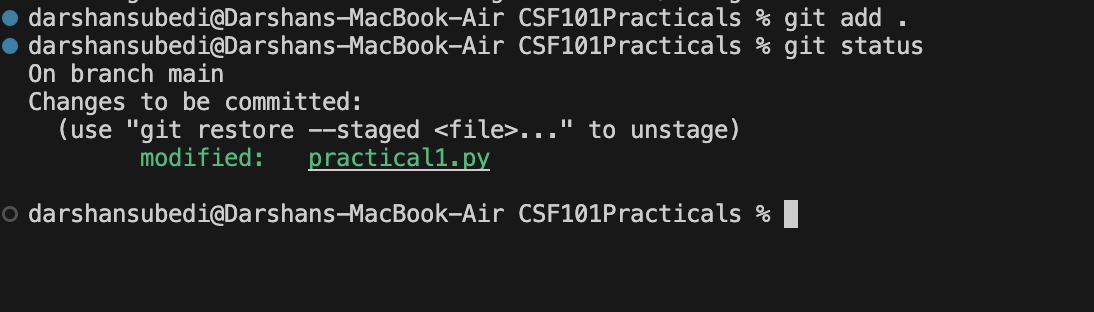
git add .
This adds all the files that have been changed on created to a staging environment.
Step 6: Next, type the following command
git commit -m "My first commit"
You have now made your very first git commit. To check all commits that were made to your git repository, you can type the following command
git log
A successful repository and commit can be seen as follows:
Part 4: Making changes to the file in a git repository
Step 1: Open your VScode window.
Step 2: Make some changes in the file that is saved in your git repository (i.e. Practical1.py ). You can see the changes I have in comparison to my previous code snippet. I have changed the student name and student number variable.
studentName = "Jigme Zangmo"
studentNumber = "02190102"

print("My name is " + studentName + " and my student number is " + studentNumber)
Step 3: go to the terminal and follow Step 4 from Part 3 of this practical as follows.
git add .
Then type the following command:
git status
You can see that git has detected some changes made to your working repository.
Continue with the following commands:
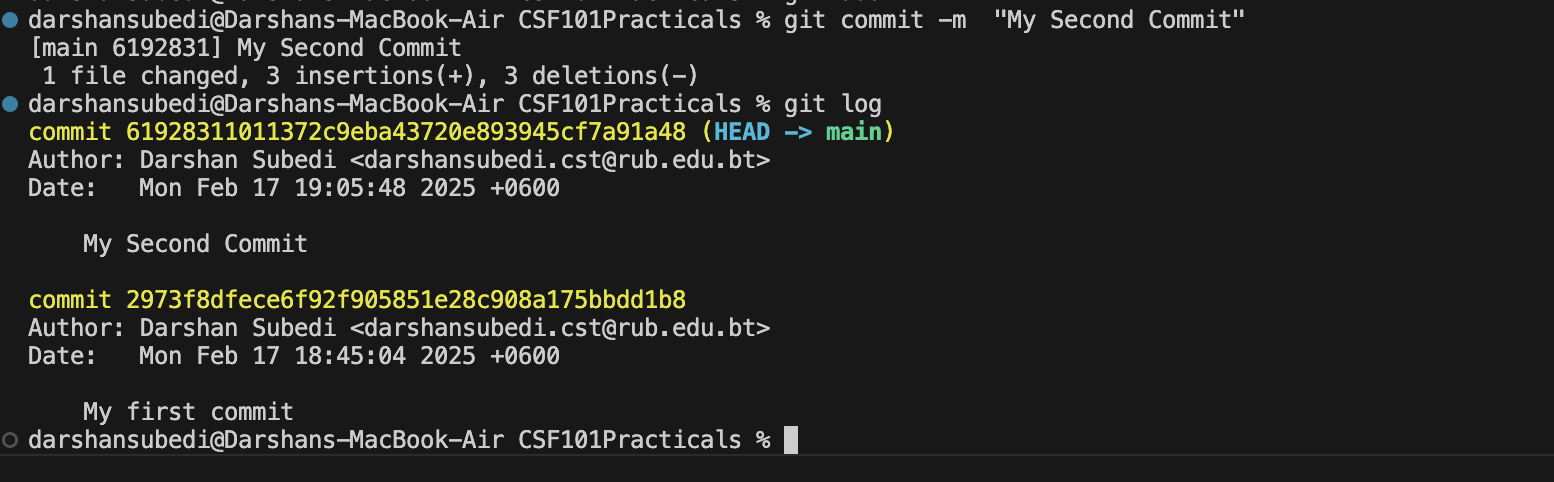
git commit -m "My Second commit"
Step 5: Using the git log command, you can now see the details of the two separate commits that were made into the repository.
Congratulations you now know how to:
- Initialize a git repository
- Add and commit files to the git repository
- Make changes to the files inside the repository and make new commits
- View the log of all commits made to the repository
Part 5: Using GitHub
Lets start first by creating a repository in github
Step 1: Using a browser, search for github.com and login using your credentials
Step 2: Click on your profile avatar in the top right-hand corner of the screen, select the repository option in the drop-down menu
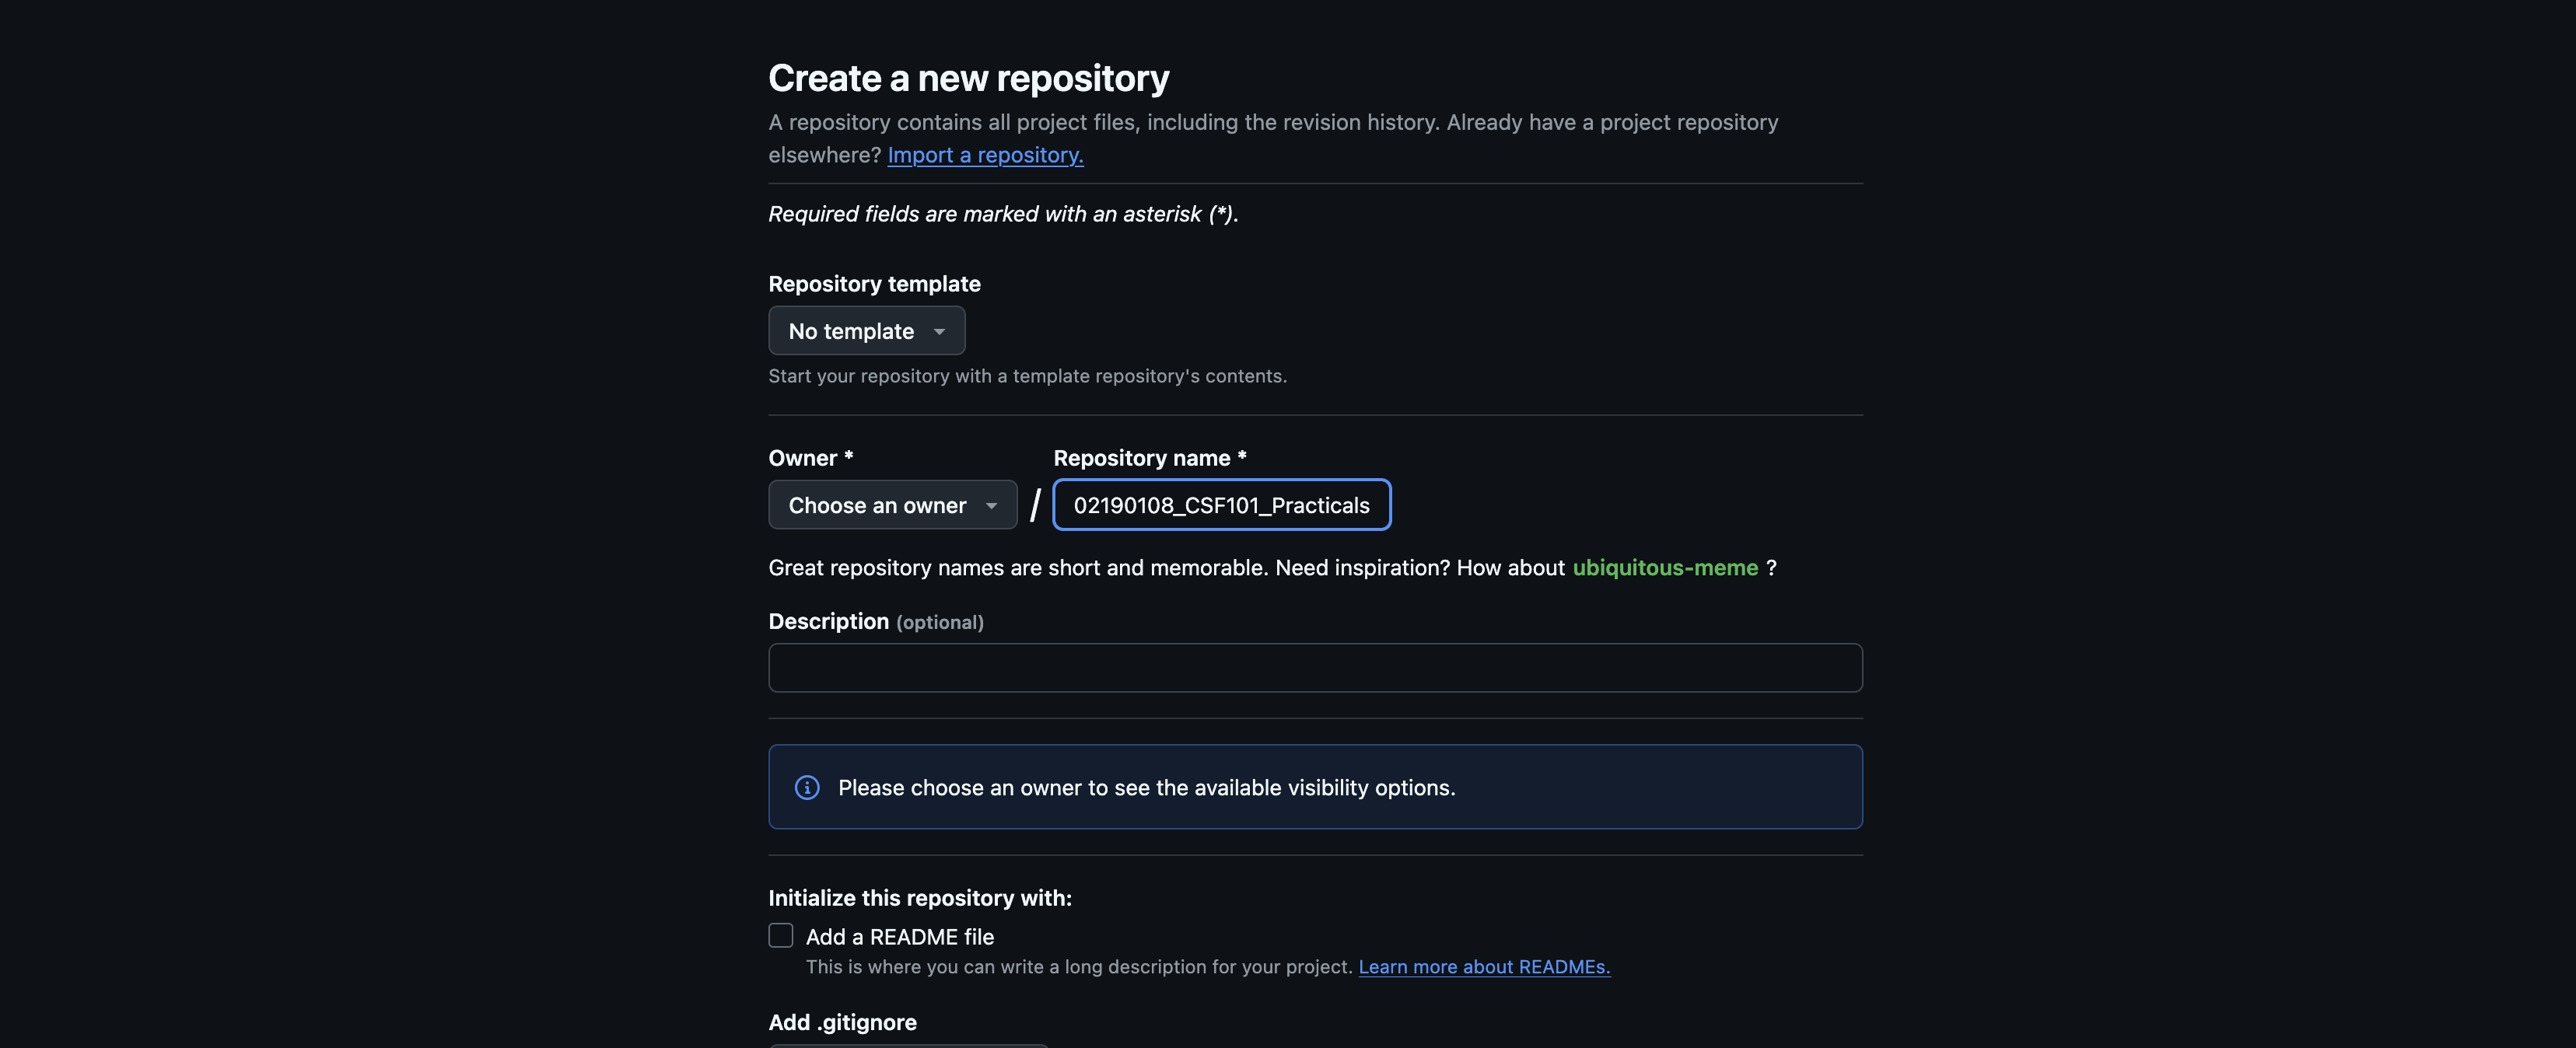
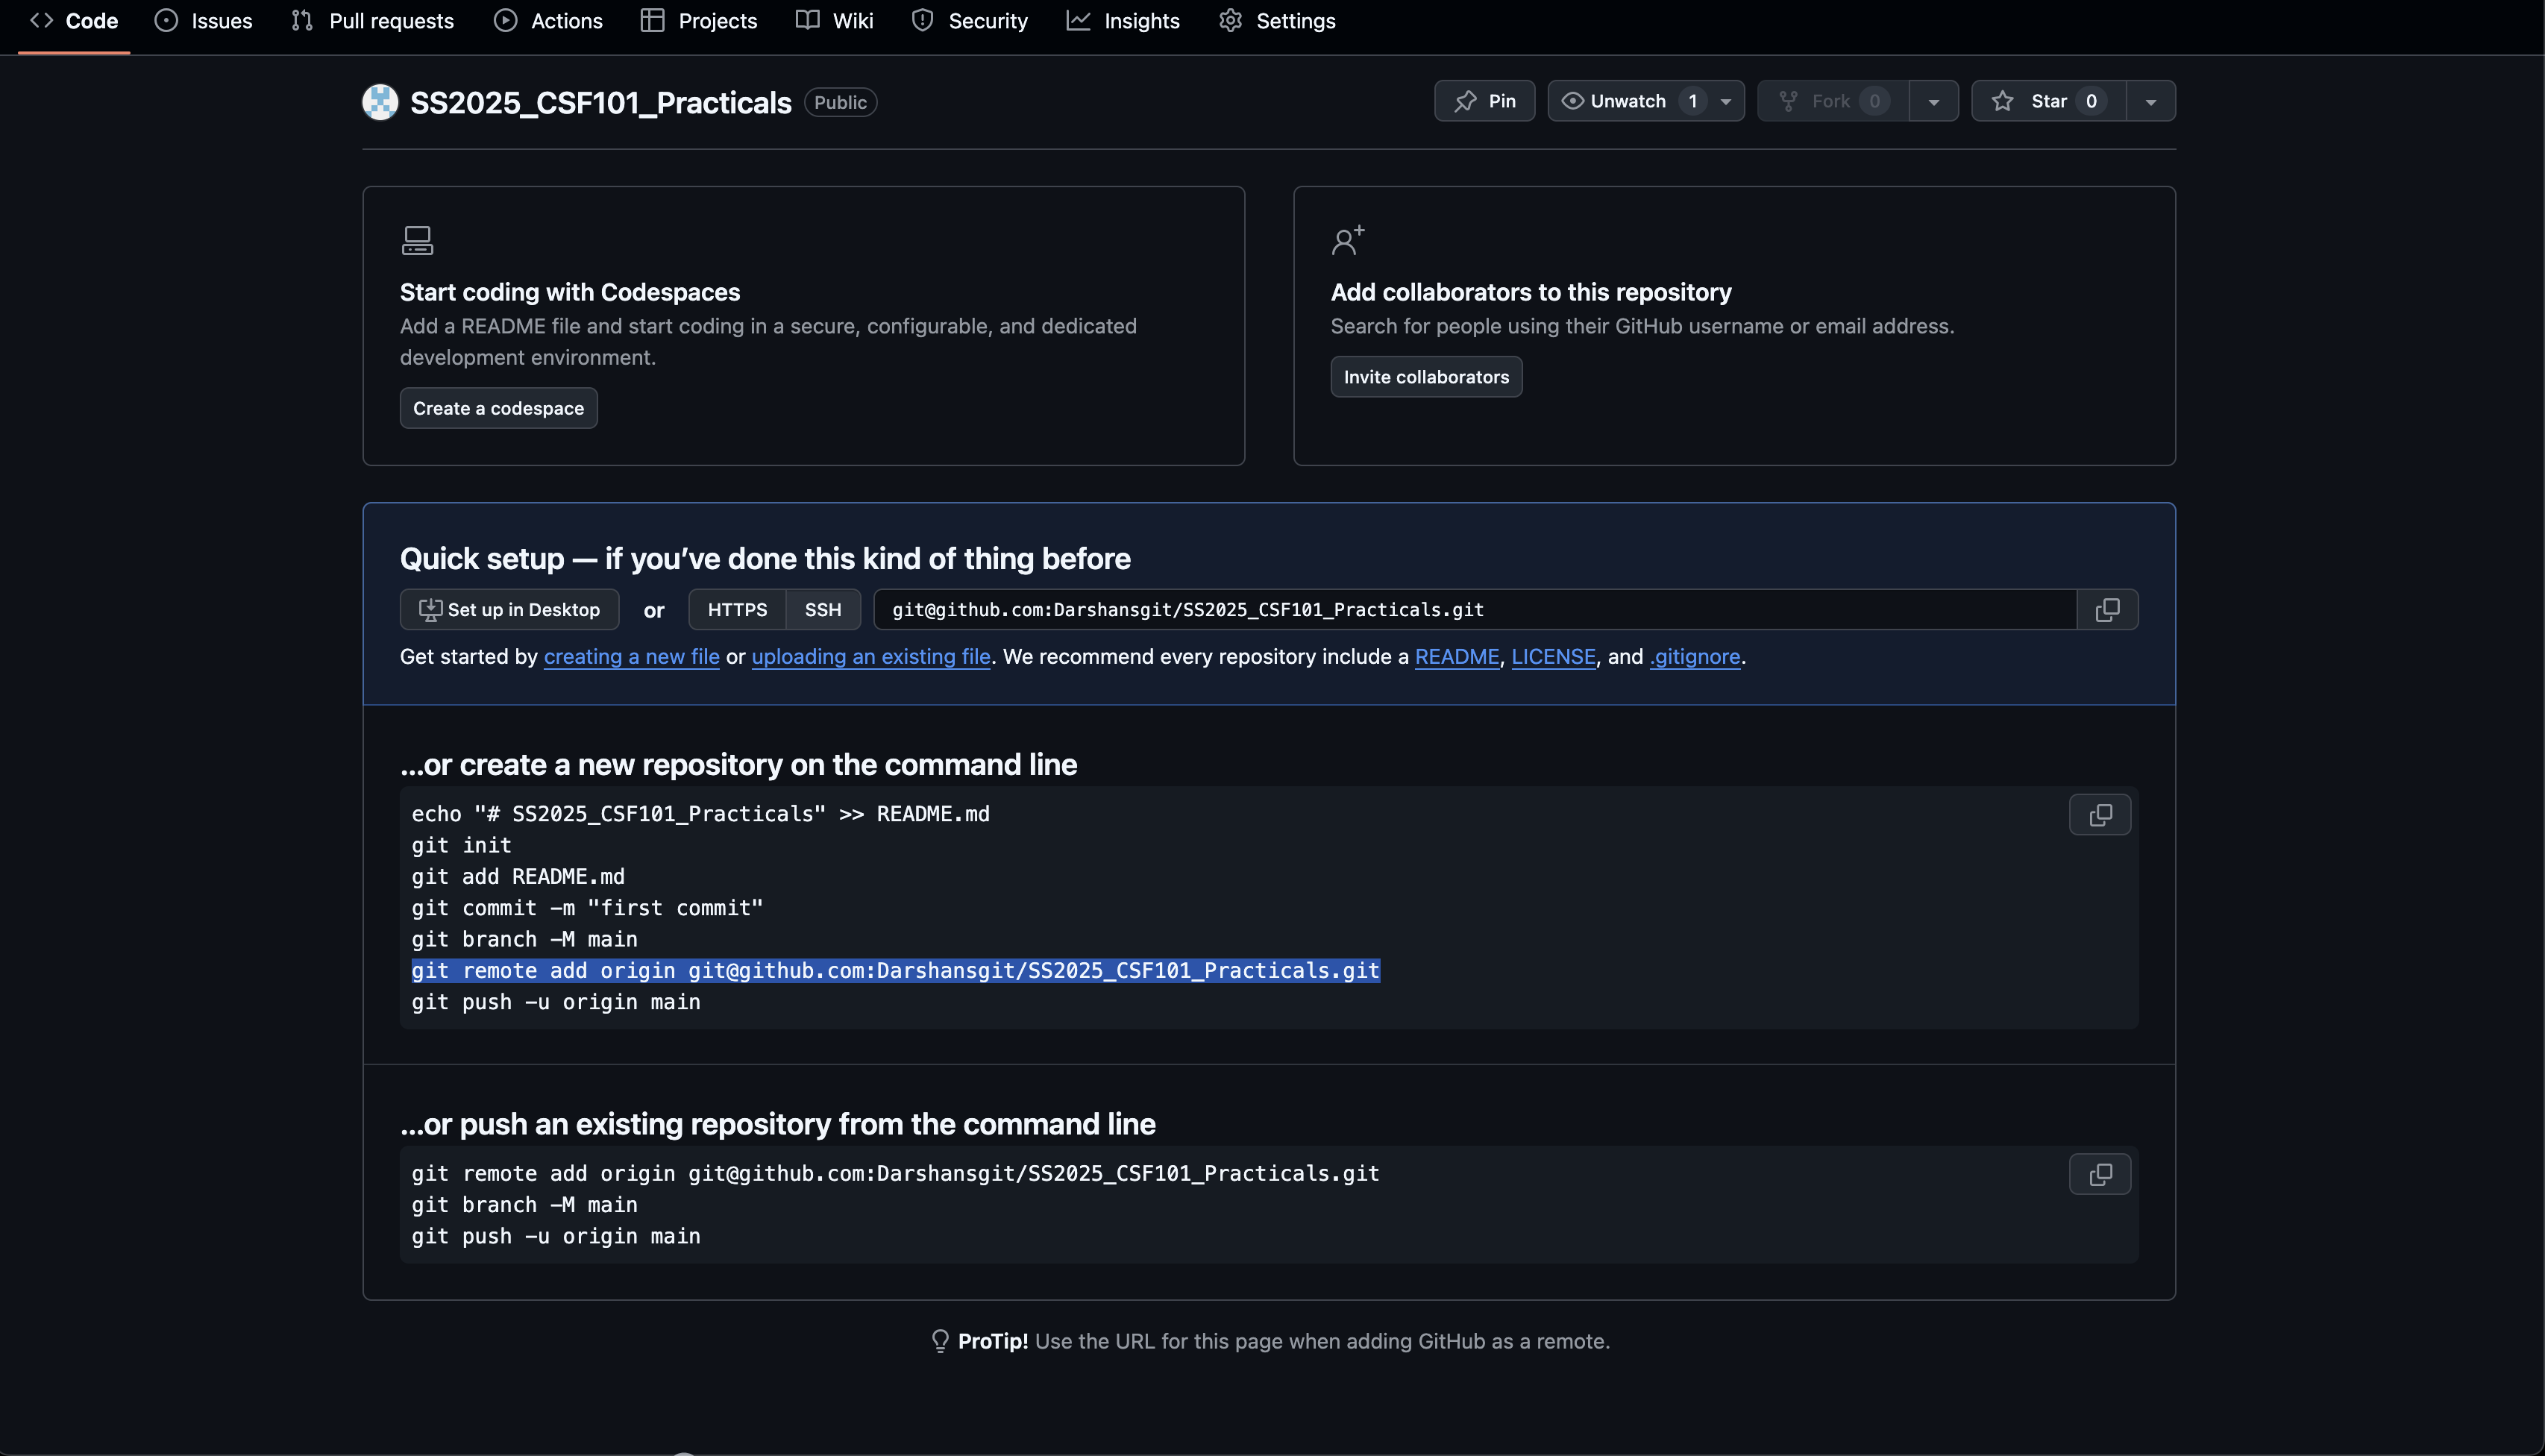
Step 3: Click on the new option on the top right-hand side of the screen. In the create repository page, name your new repository in the format shown below. Select your account as the repository owner and click on the Create Repository button on the bottom right side of the page:
Eg: 02240224_CSF101_Practicals
Step 4: Once a empty repository is created as shown below, click on the SSH option and copy the link as highlighted below:
Step 5: Go back to the terminal of your VScode window and paste this link there. Once you have entered the command, you can type git remote -v to check if the repository has been added successfully:

Note: the following step is very important
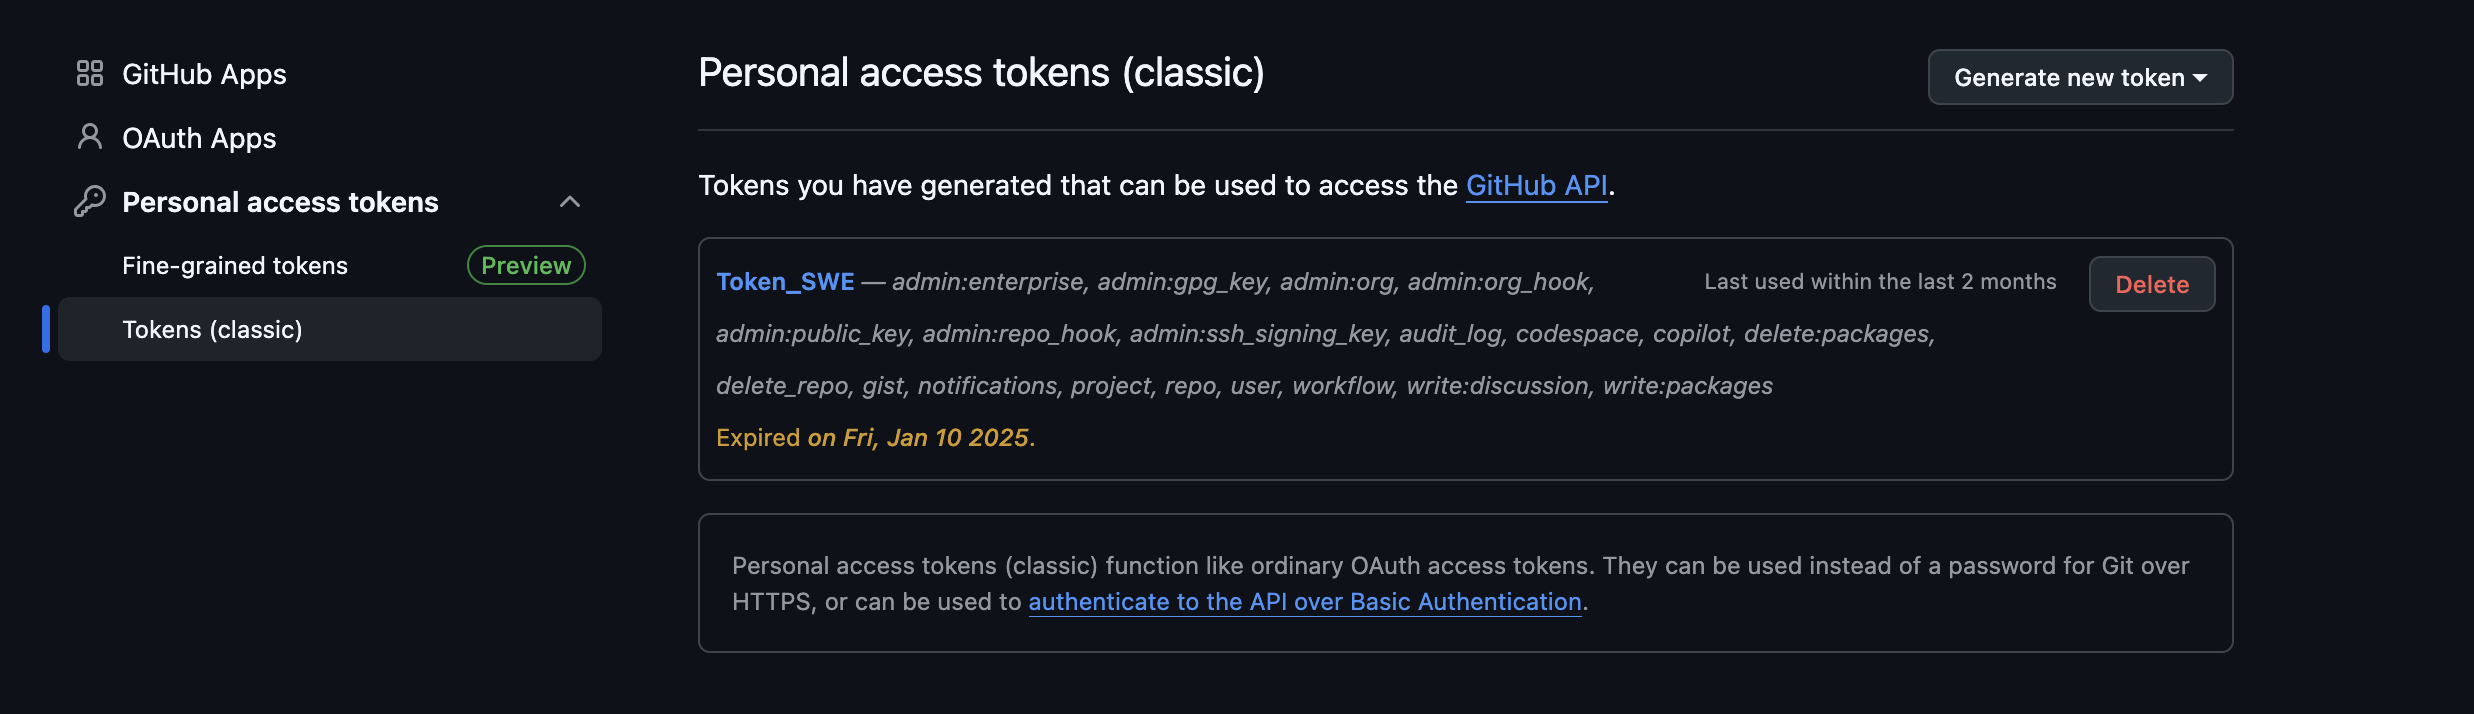
Step 6: Navigate to the same drop-down menu as shown in Step 2 and click on the settings option. Navigate the settings page and select the developer options
Step 7: Click on the Tokens (classic) option on the left-hand side and select the generate new token(classic) option.
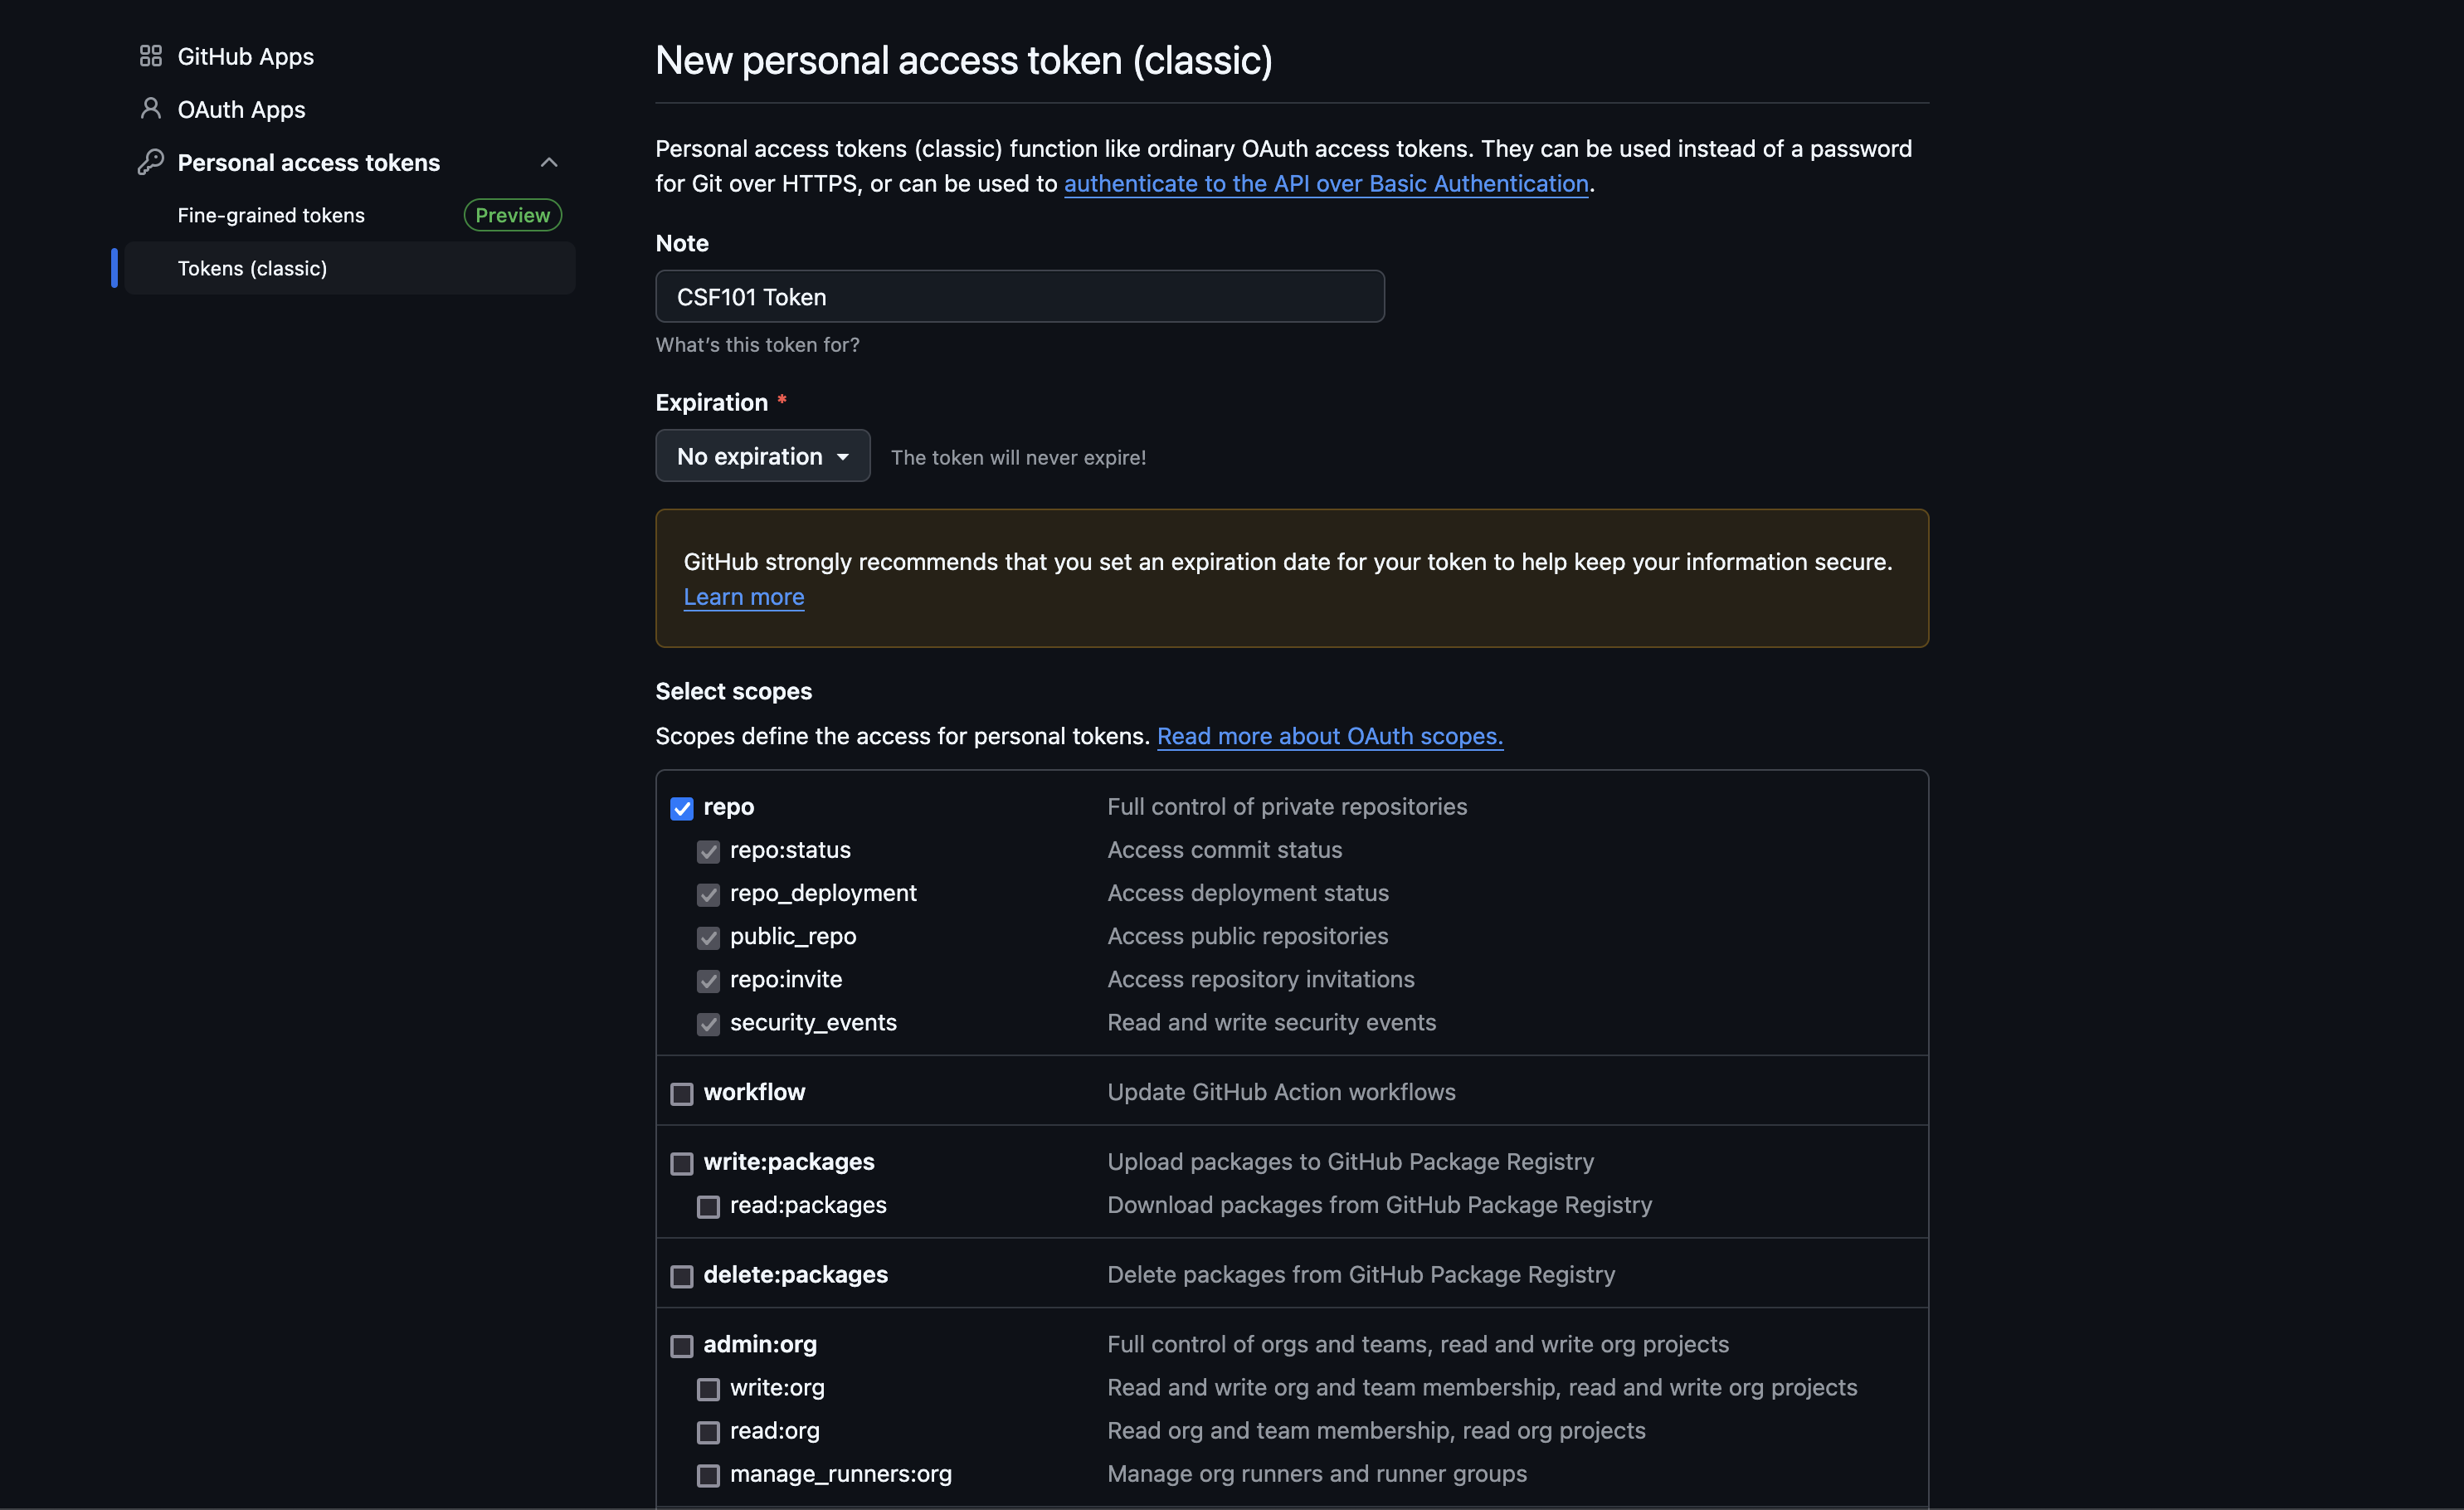
Step 8: In the generate token page, provide a small note for the token, and in the Expiration drop-down menu, select the no expiration option. Then select all the checkboxes on this page and click on the generate token button at the bottom of the page
Step 9: Copy the token link that has been generated and save it in any application on your desktop. This token is important and will not be visible again.
Step 10: Take your token and replace it with the following command:
git remote set-url origin https://<token>@github.com/<username>/<repo>
Where:
- token - token you just generated in GitHub
- username - your GitHub username
- repo - the name of your GitHub repo
Your command should look like this:
git remote set-url origin https://ghp_OBJnrsdfsdaP251jFasdfasde4ObzzAw1qc1tA@github.com/Darshansgit/02190108_CSF101_Practicals
Step 11: Finally you can type the following command in your terminal:
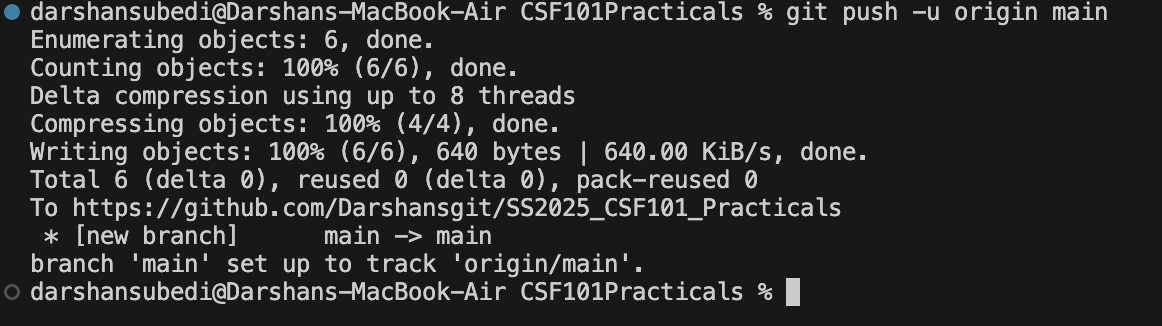
git push -u origin main
If your push was successful, you will see the following output.
You can now go and check your empty GitHub repository and notice that the file that you had created on your computers local repository is now on git.
Note: for future pushes, you need not follow Step 6 to Step 10. The GitHub personal access token generation is a one-time thing (once for each repo) and you do not need to generate a new key for every push. Once you are done committing your code locally using git, you may proceed with the git push -u origin main command to directly push your code to git here after.
Congratulations, you now know how to:
- Create an empty GitHub repository
- Generate an access token for you to push your local repository into the remote repository on GitHub
- Authenticate using the access token (this needs to be done one time only)
- Push your local repository to your remote repository.
This concludes Practical 0. Hereafter, all your practicals are expected to be completed and pushed to Git Hub. Your GitHub repository will be reviewed before the end of the semester to check if you have completed all your practicals. Please practice this process to get familiar with git and github.